Sell Collectibles
This guide will walk you through how to sell your digital collectibles using the drop tool within Phosphor Studio.
Access Drop Tools
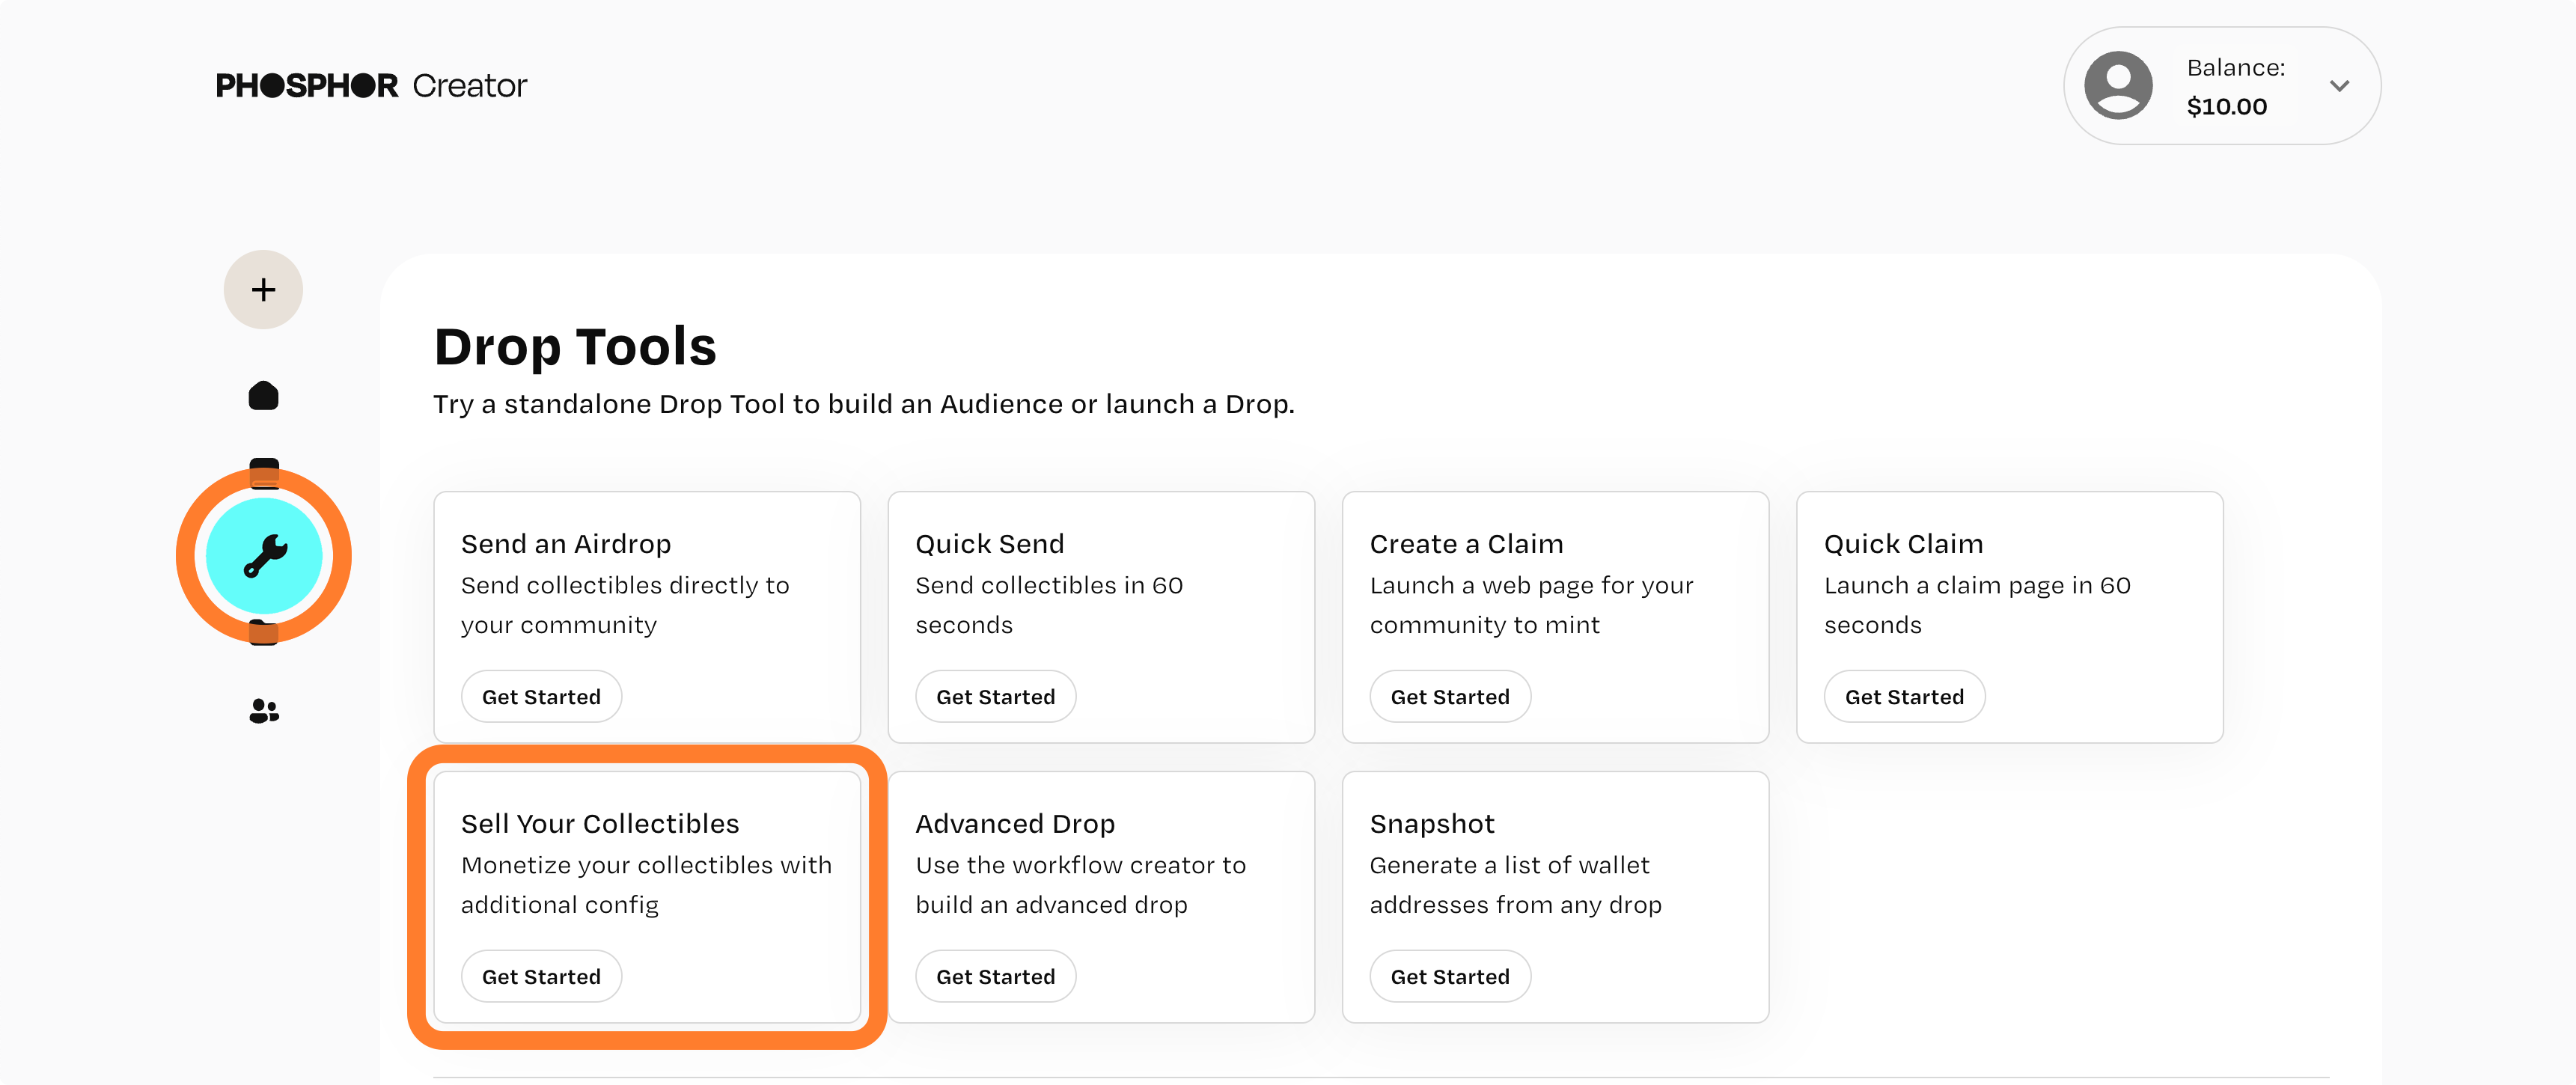
- Navigate to Drop Tools within the Phosphor Studio homepage
- Look for the "Sell Your Digital Collectibles" card and click on the "Get Started" button to begin
Fill Out General Details
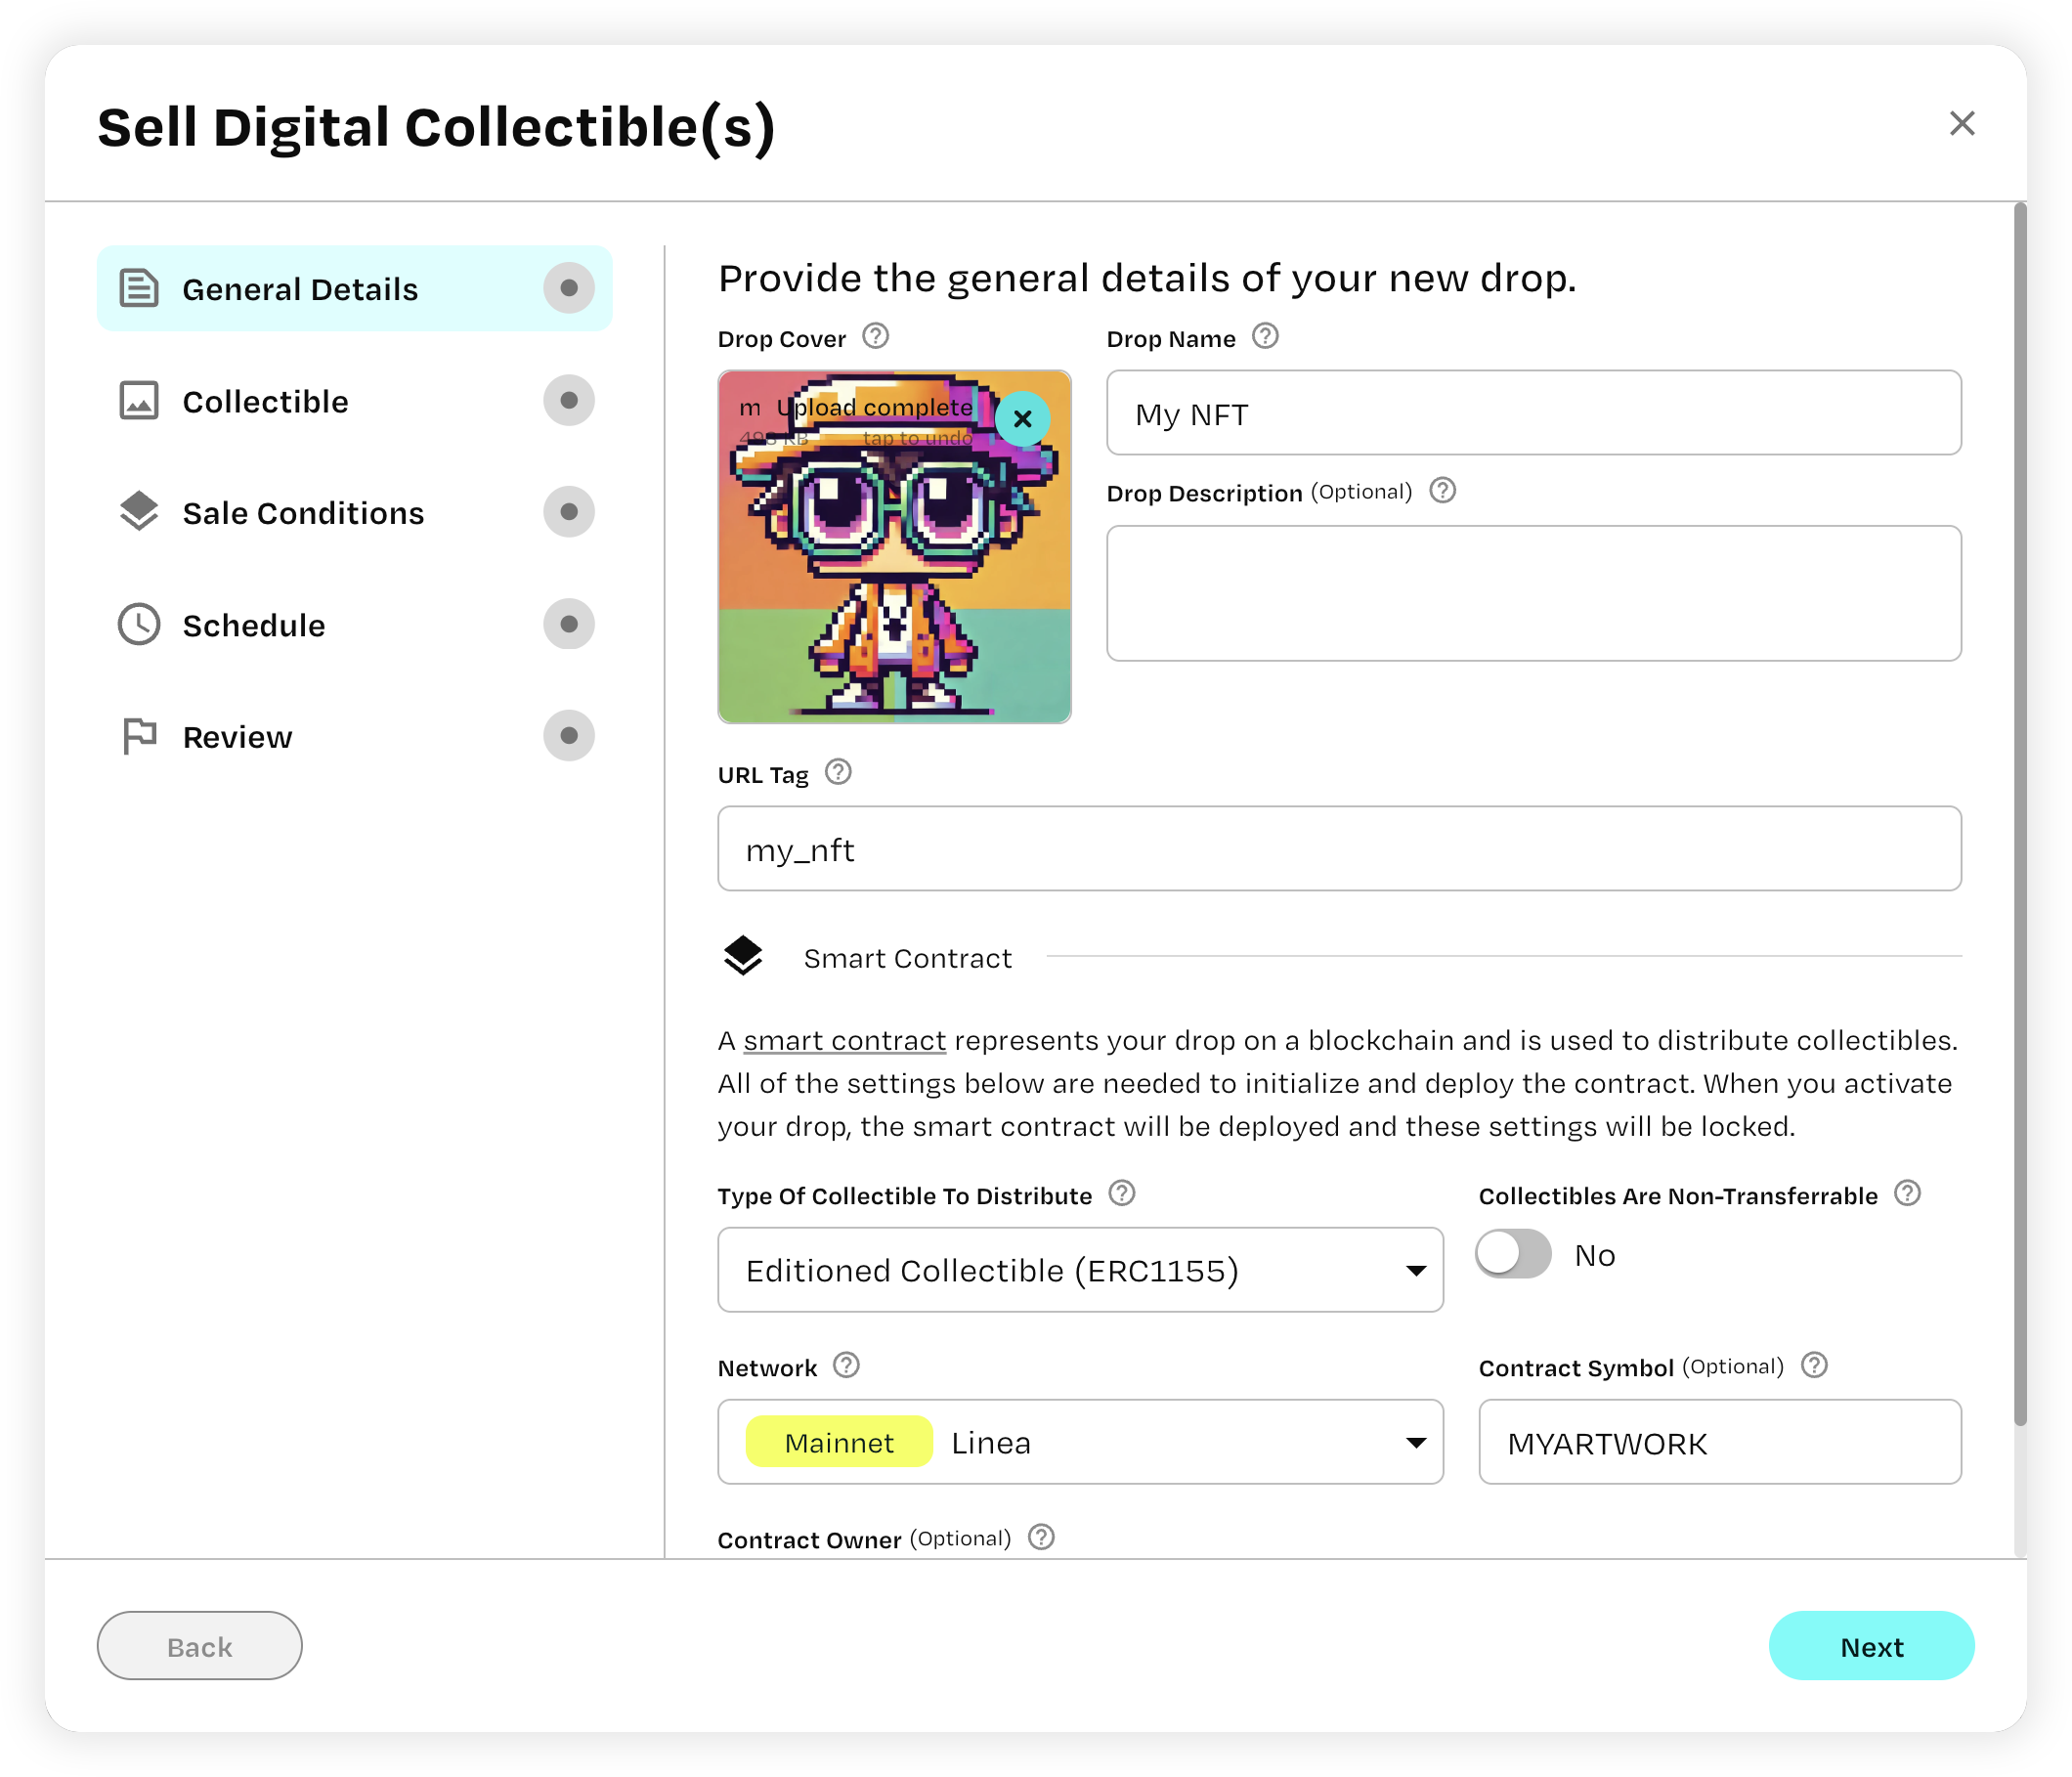
In this section, you’ll provide the basic information for your drop:
- Drop Name: Enter a name that reflects your collectible
- Drop Cover: Upload a cover image (JPG, GIF, PNG formats under 50 MB)
You’ll also find additional fields that you can customize according to your preferences:
- Contract Owner: Set your wallet address as the owner if desired
- URL Tag: Create a custom URL tag for easy access (otherwise auto-populated based on the drop name)
- Type of Collectible: Choose between ERC 1155 or ERC 721
- Non-Transferable Option: Decide if the collectible can be transferable (sold/traded) or non-transferable (bound to the account it goes to)
- Contract Symbol: Customize the contract symbol (otherwise auto-populated based on the drop name)
If you’re unsure about these settings, you can proceed with Phosphor’s default configurations by clicking "Next".
Define Collectible
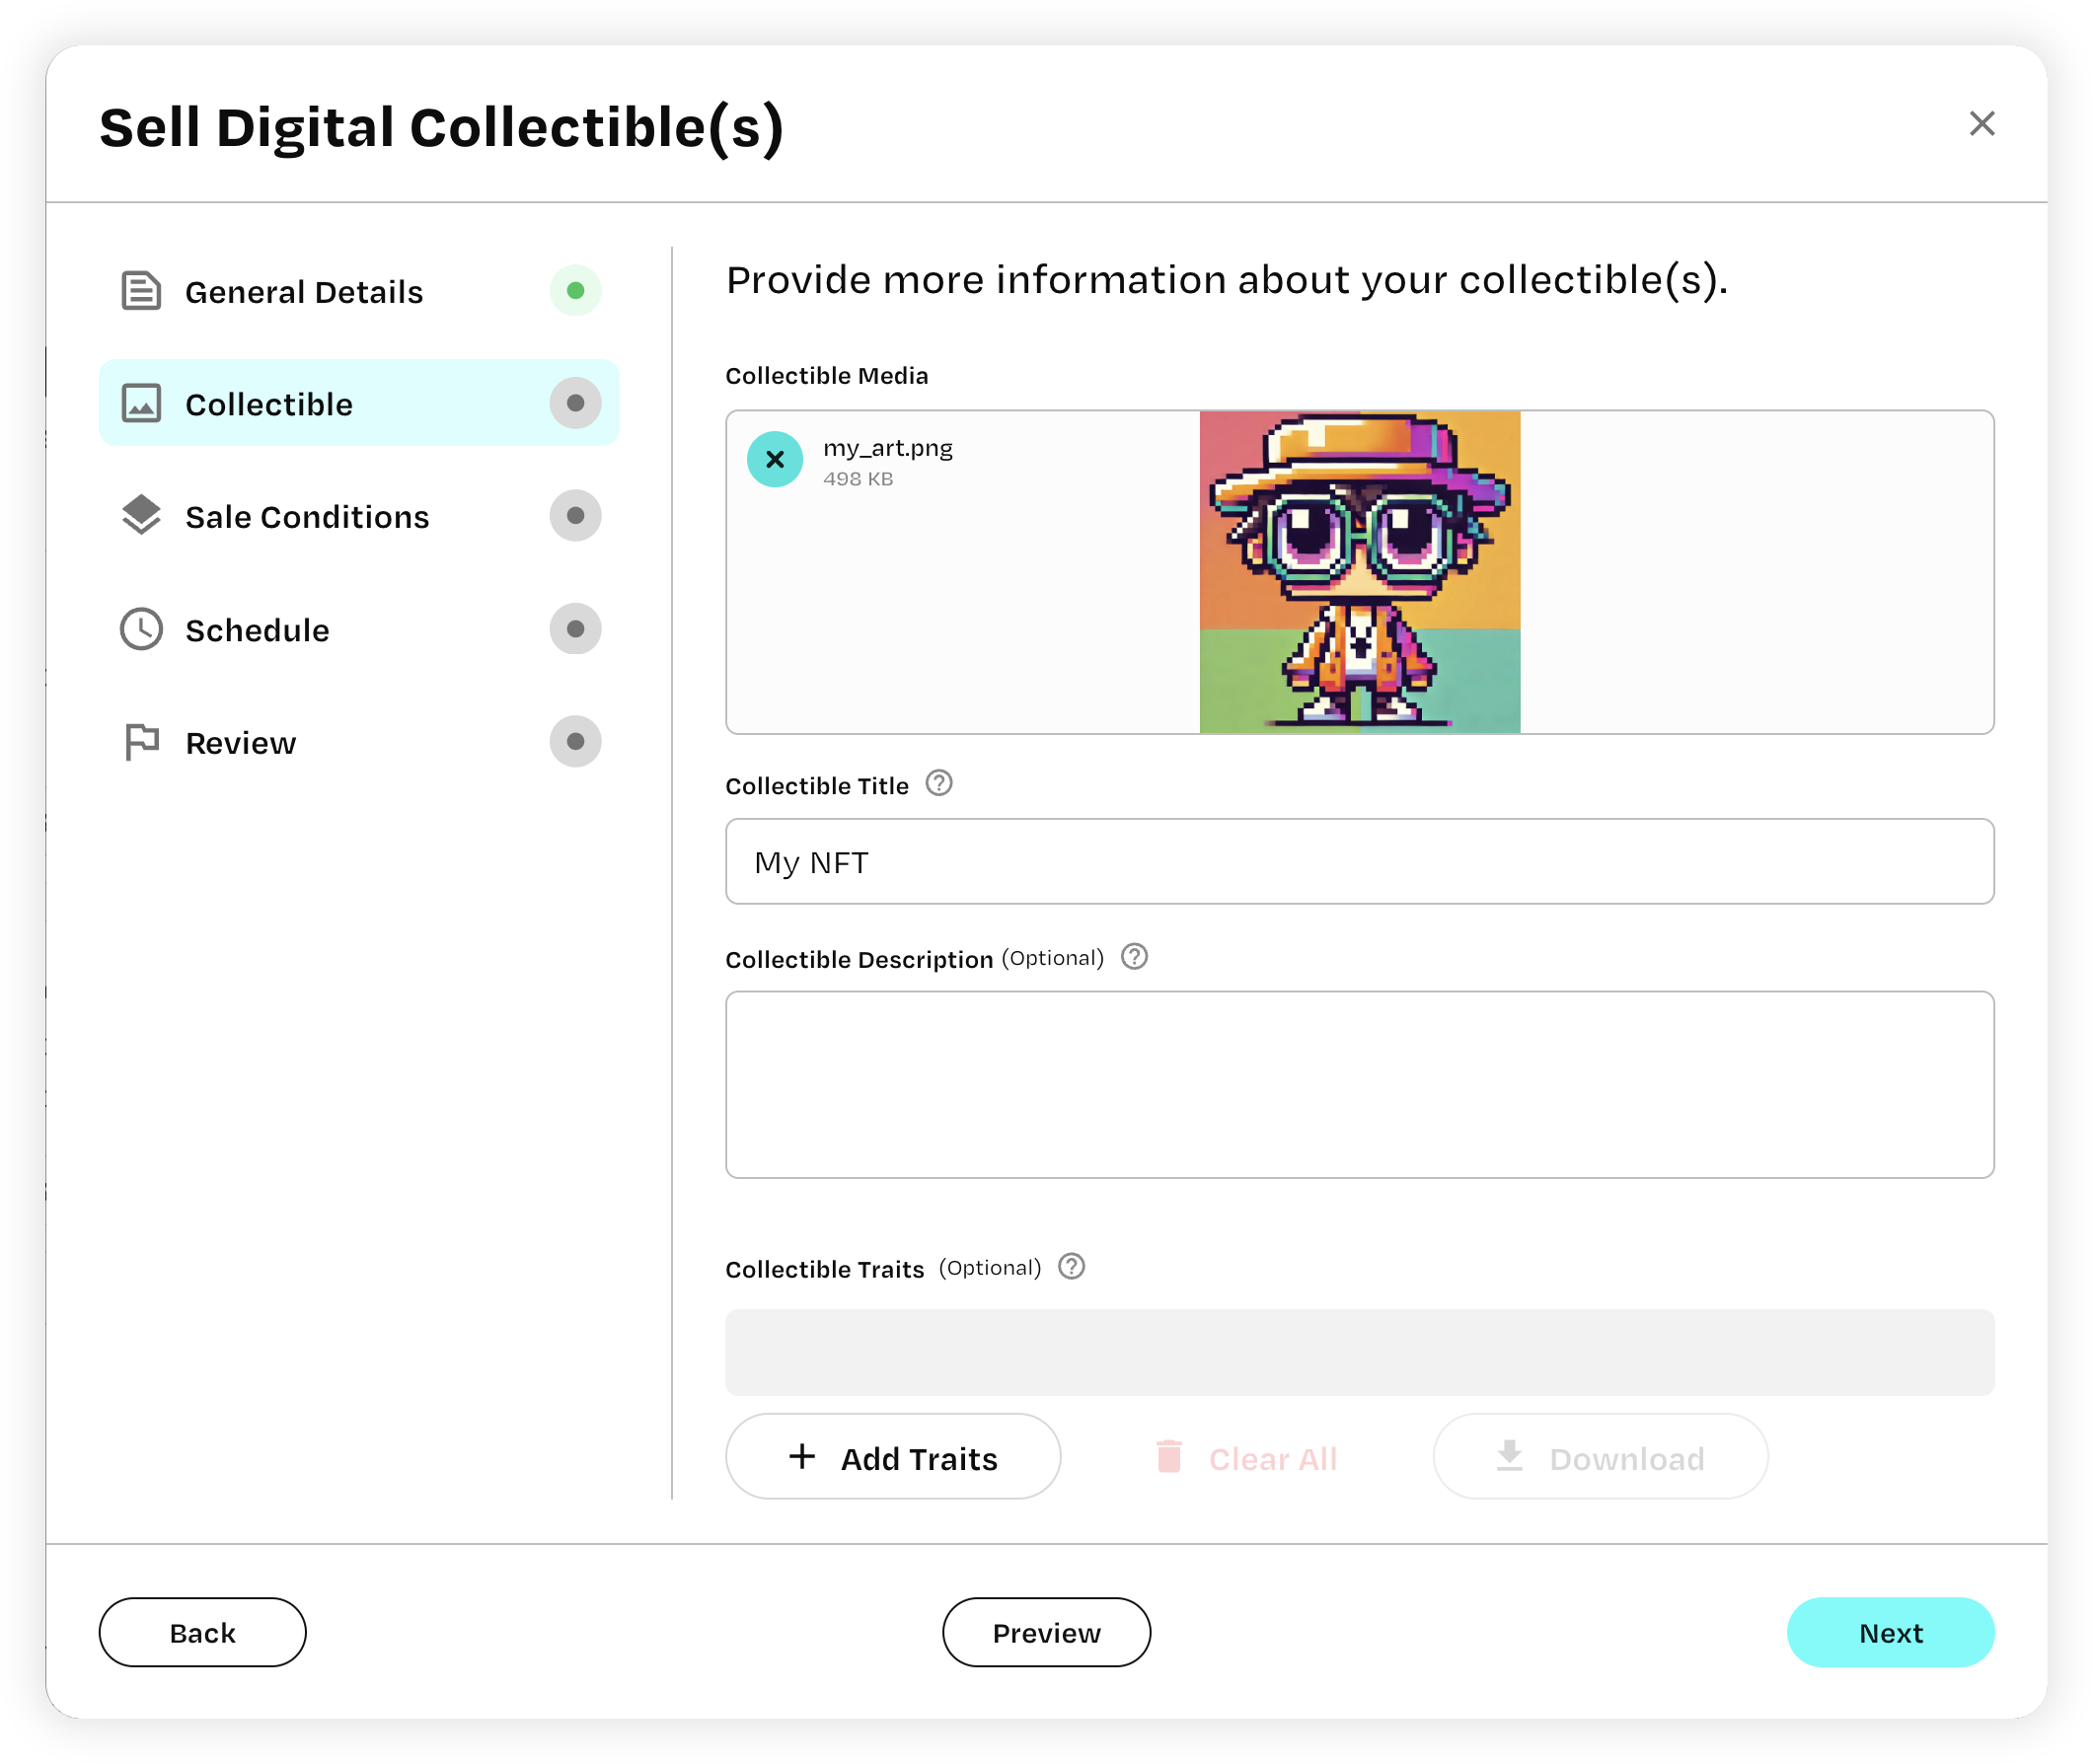
- Fill out your collectible’s title
- Add a general description of your collectible
- Add any traits or metadata, if applicable, here (can leave blank if irrelevant)
Click “Next” to proceed.
Set Sale Conditions
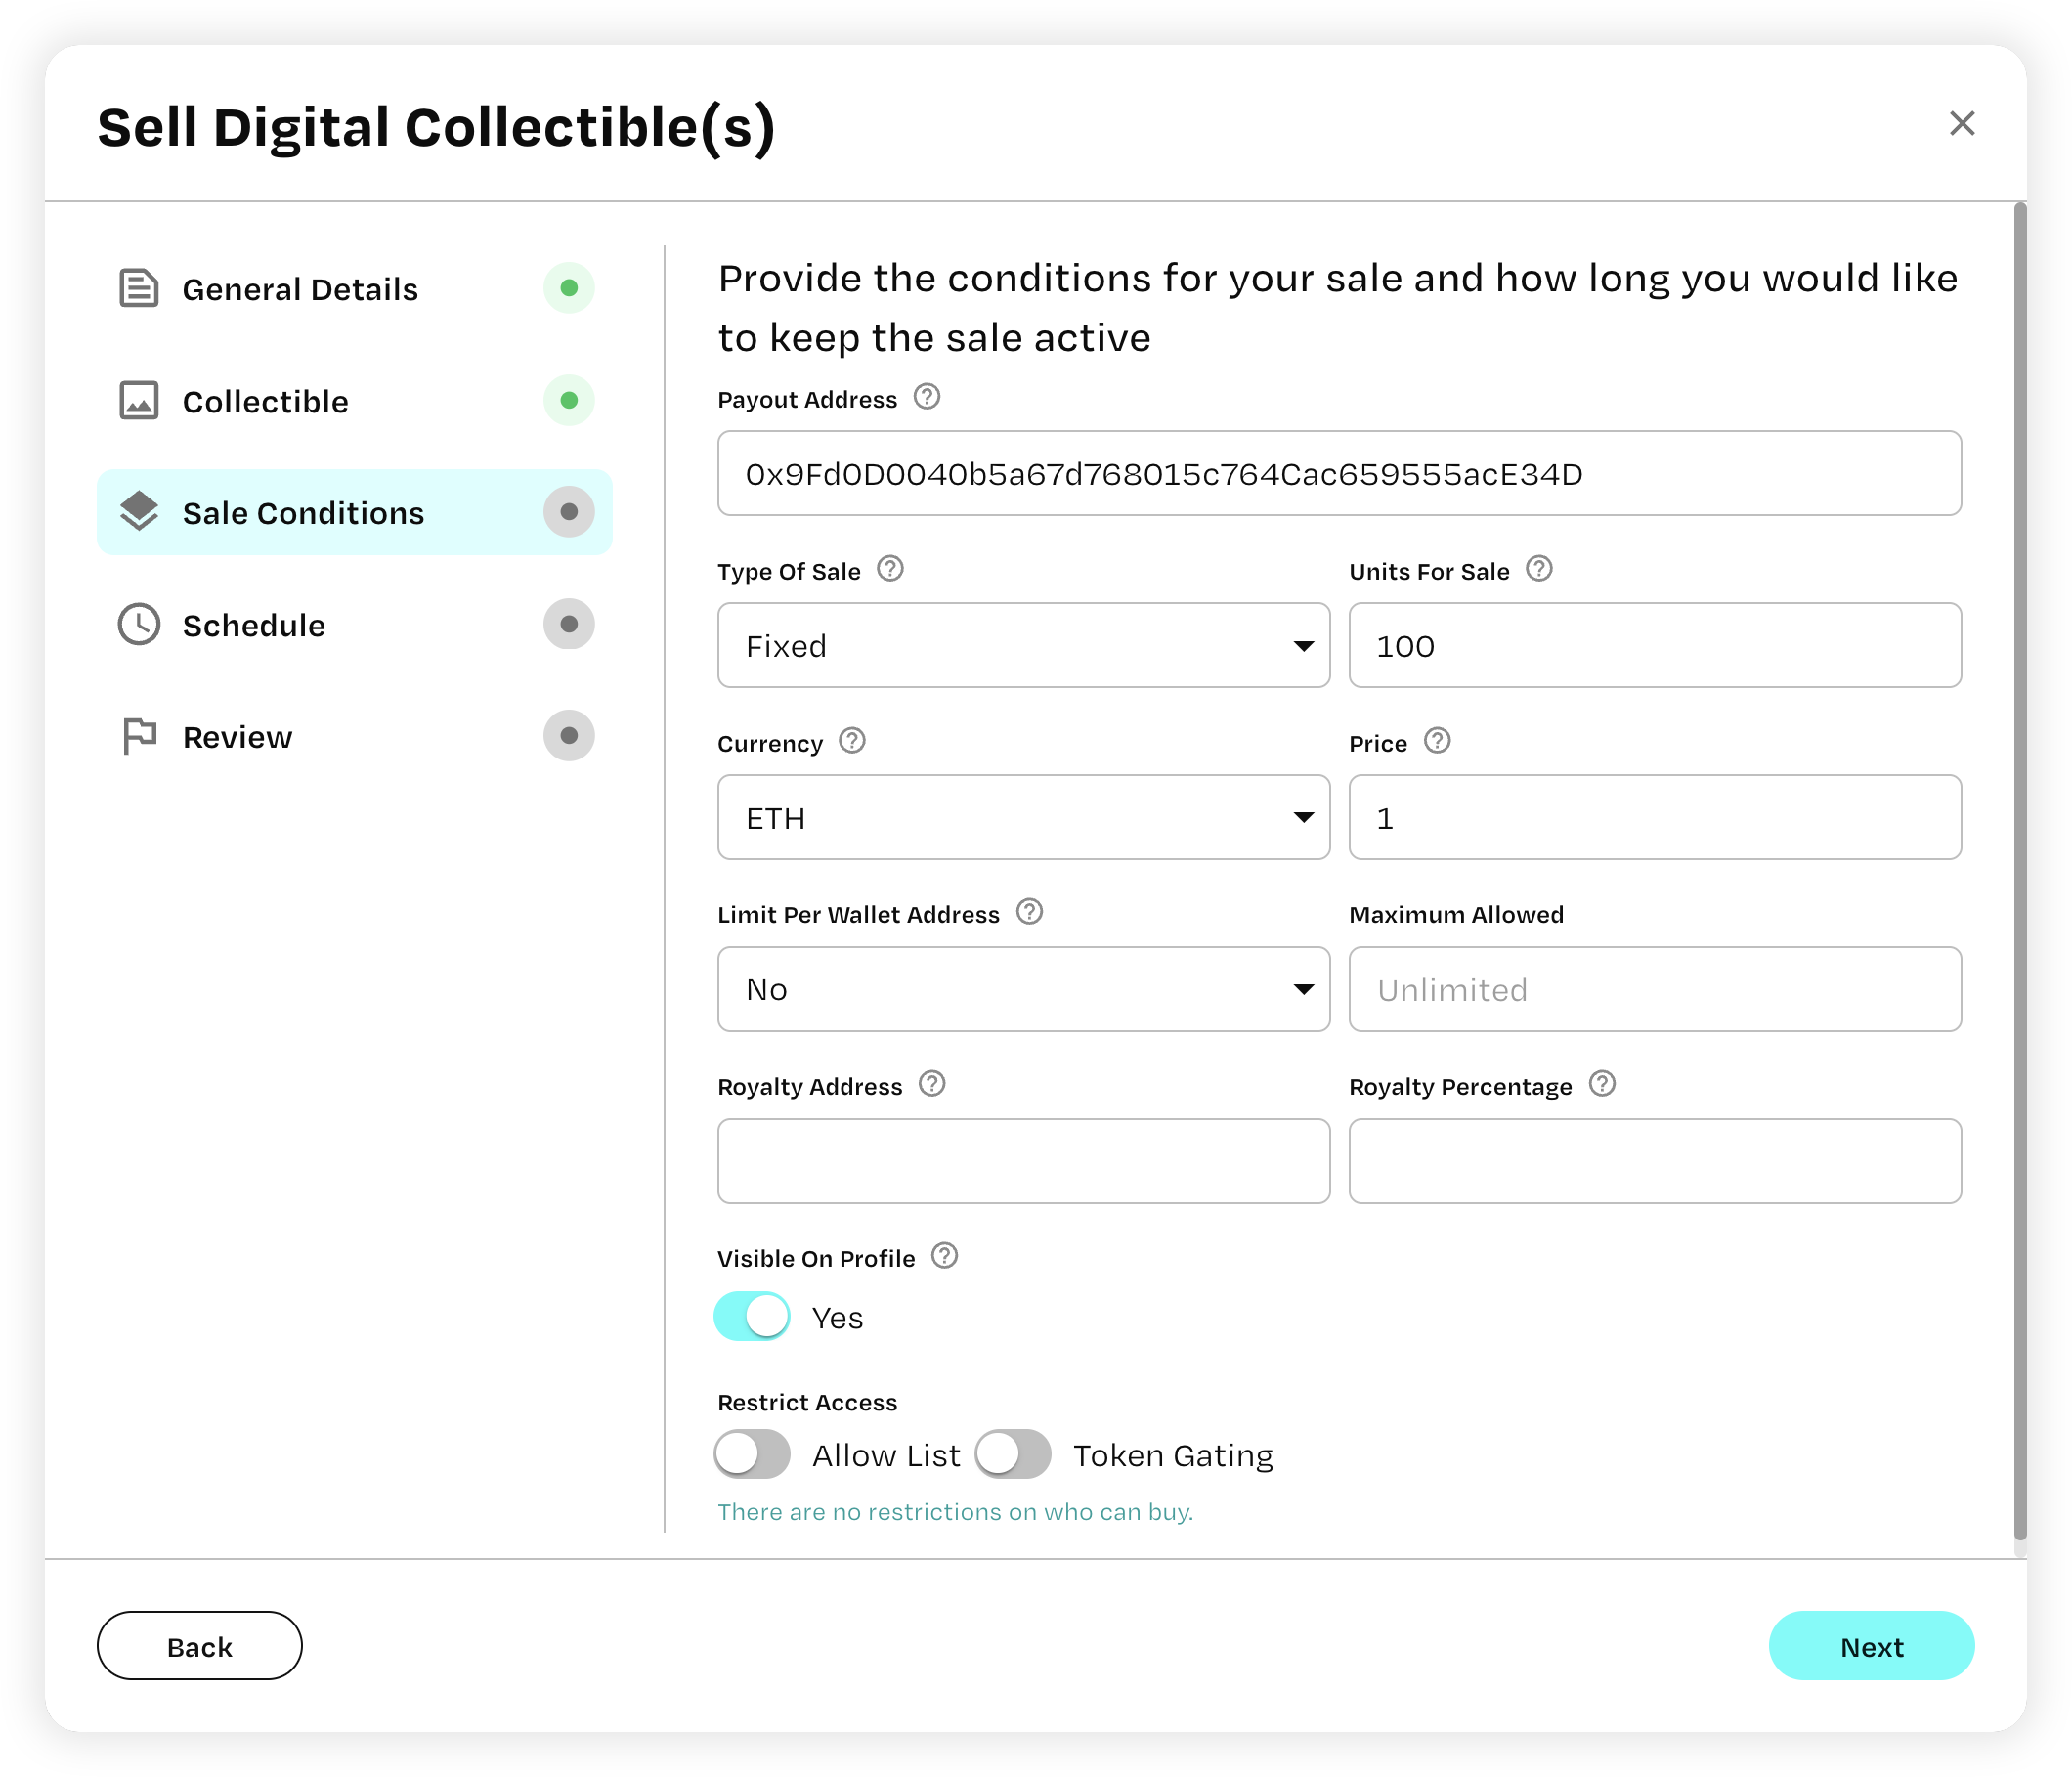
This section allows you to customize your distribution details and length of sale.
- Payout Wallet Address: Specify where you want the proceeds to be sent to (where you should get paid)
- Sale Amount and Price: Set the number of collectibles available (type of sale) and their price in the native currency of the network (e.g., 1000 MATIC on Polygon).
- Per Wallet Limit: If applicable, set a limit on how many collectibles each wallet can purchase. Otherwise, select “No” from the dropdown.
- Restrict Access: Customize allowlists or token-gated access for exclusive drops here. Otherwise, leave untoggled.
Click “Next” to proceed.
Scheduling and Reviewing
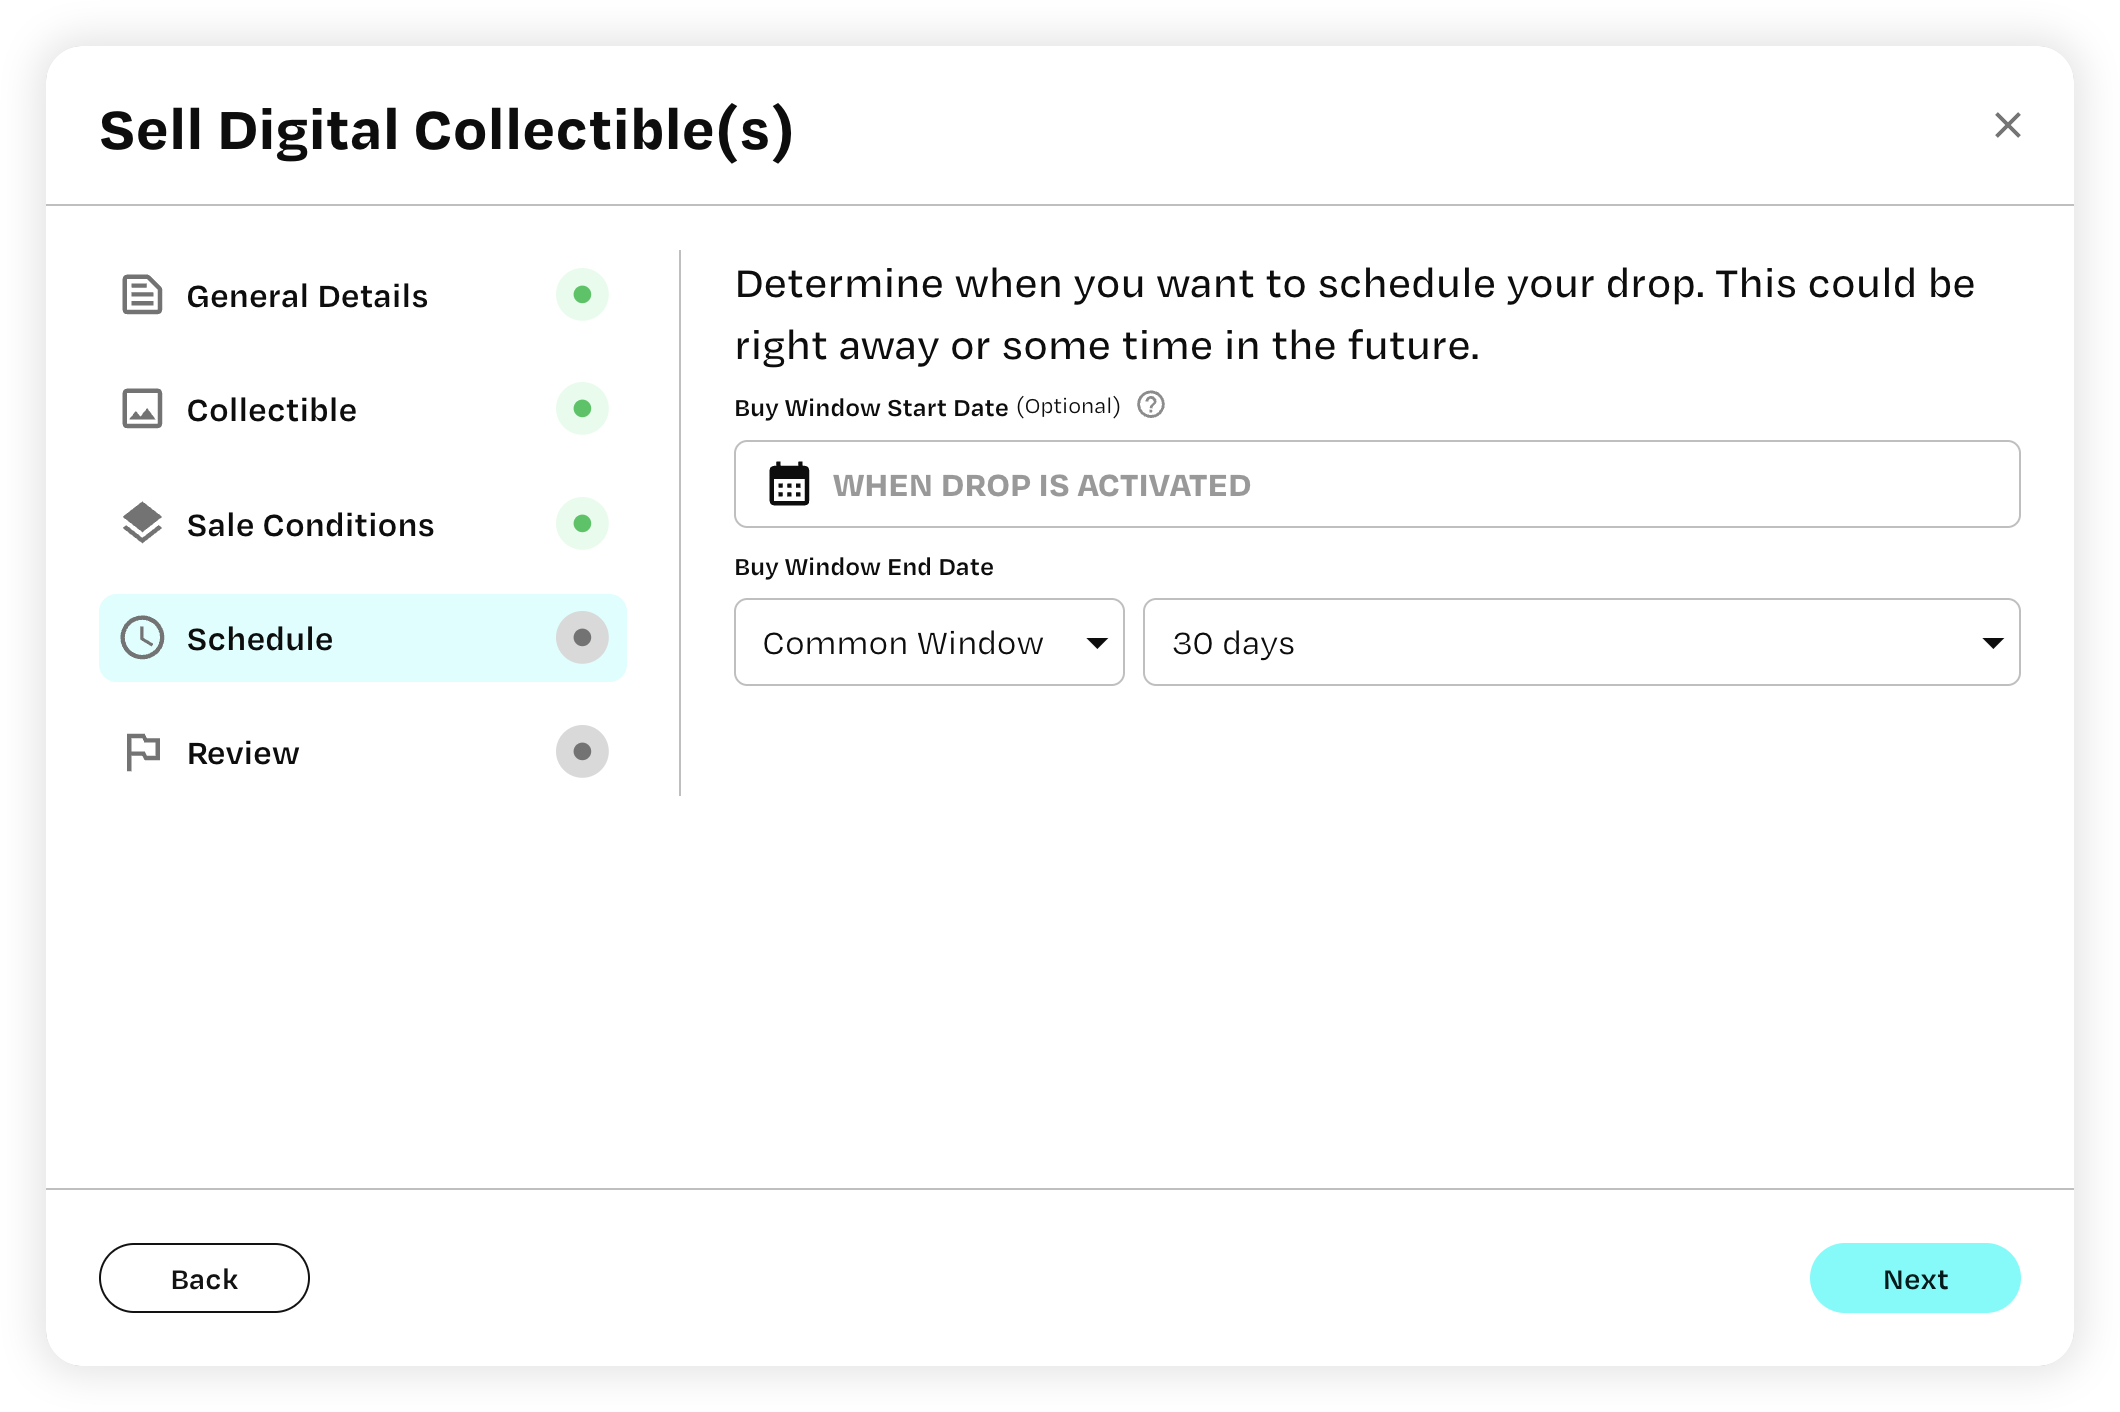
All that’s left (if you haven’t restricted audience access) is setting the time and duration of your drop.
- Schedule: Select the start date and, if applicable, an end date for your drop (to leave the buying duration open, select “Available Forever” from the dropdown to the right of the “common window” field)
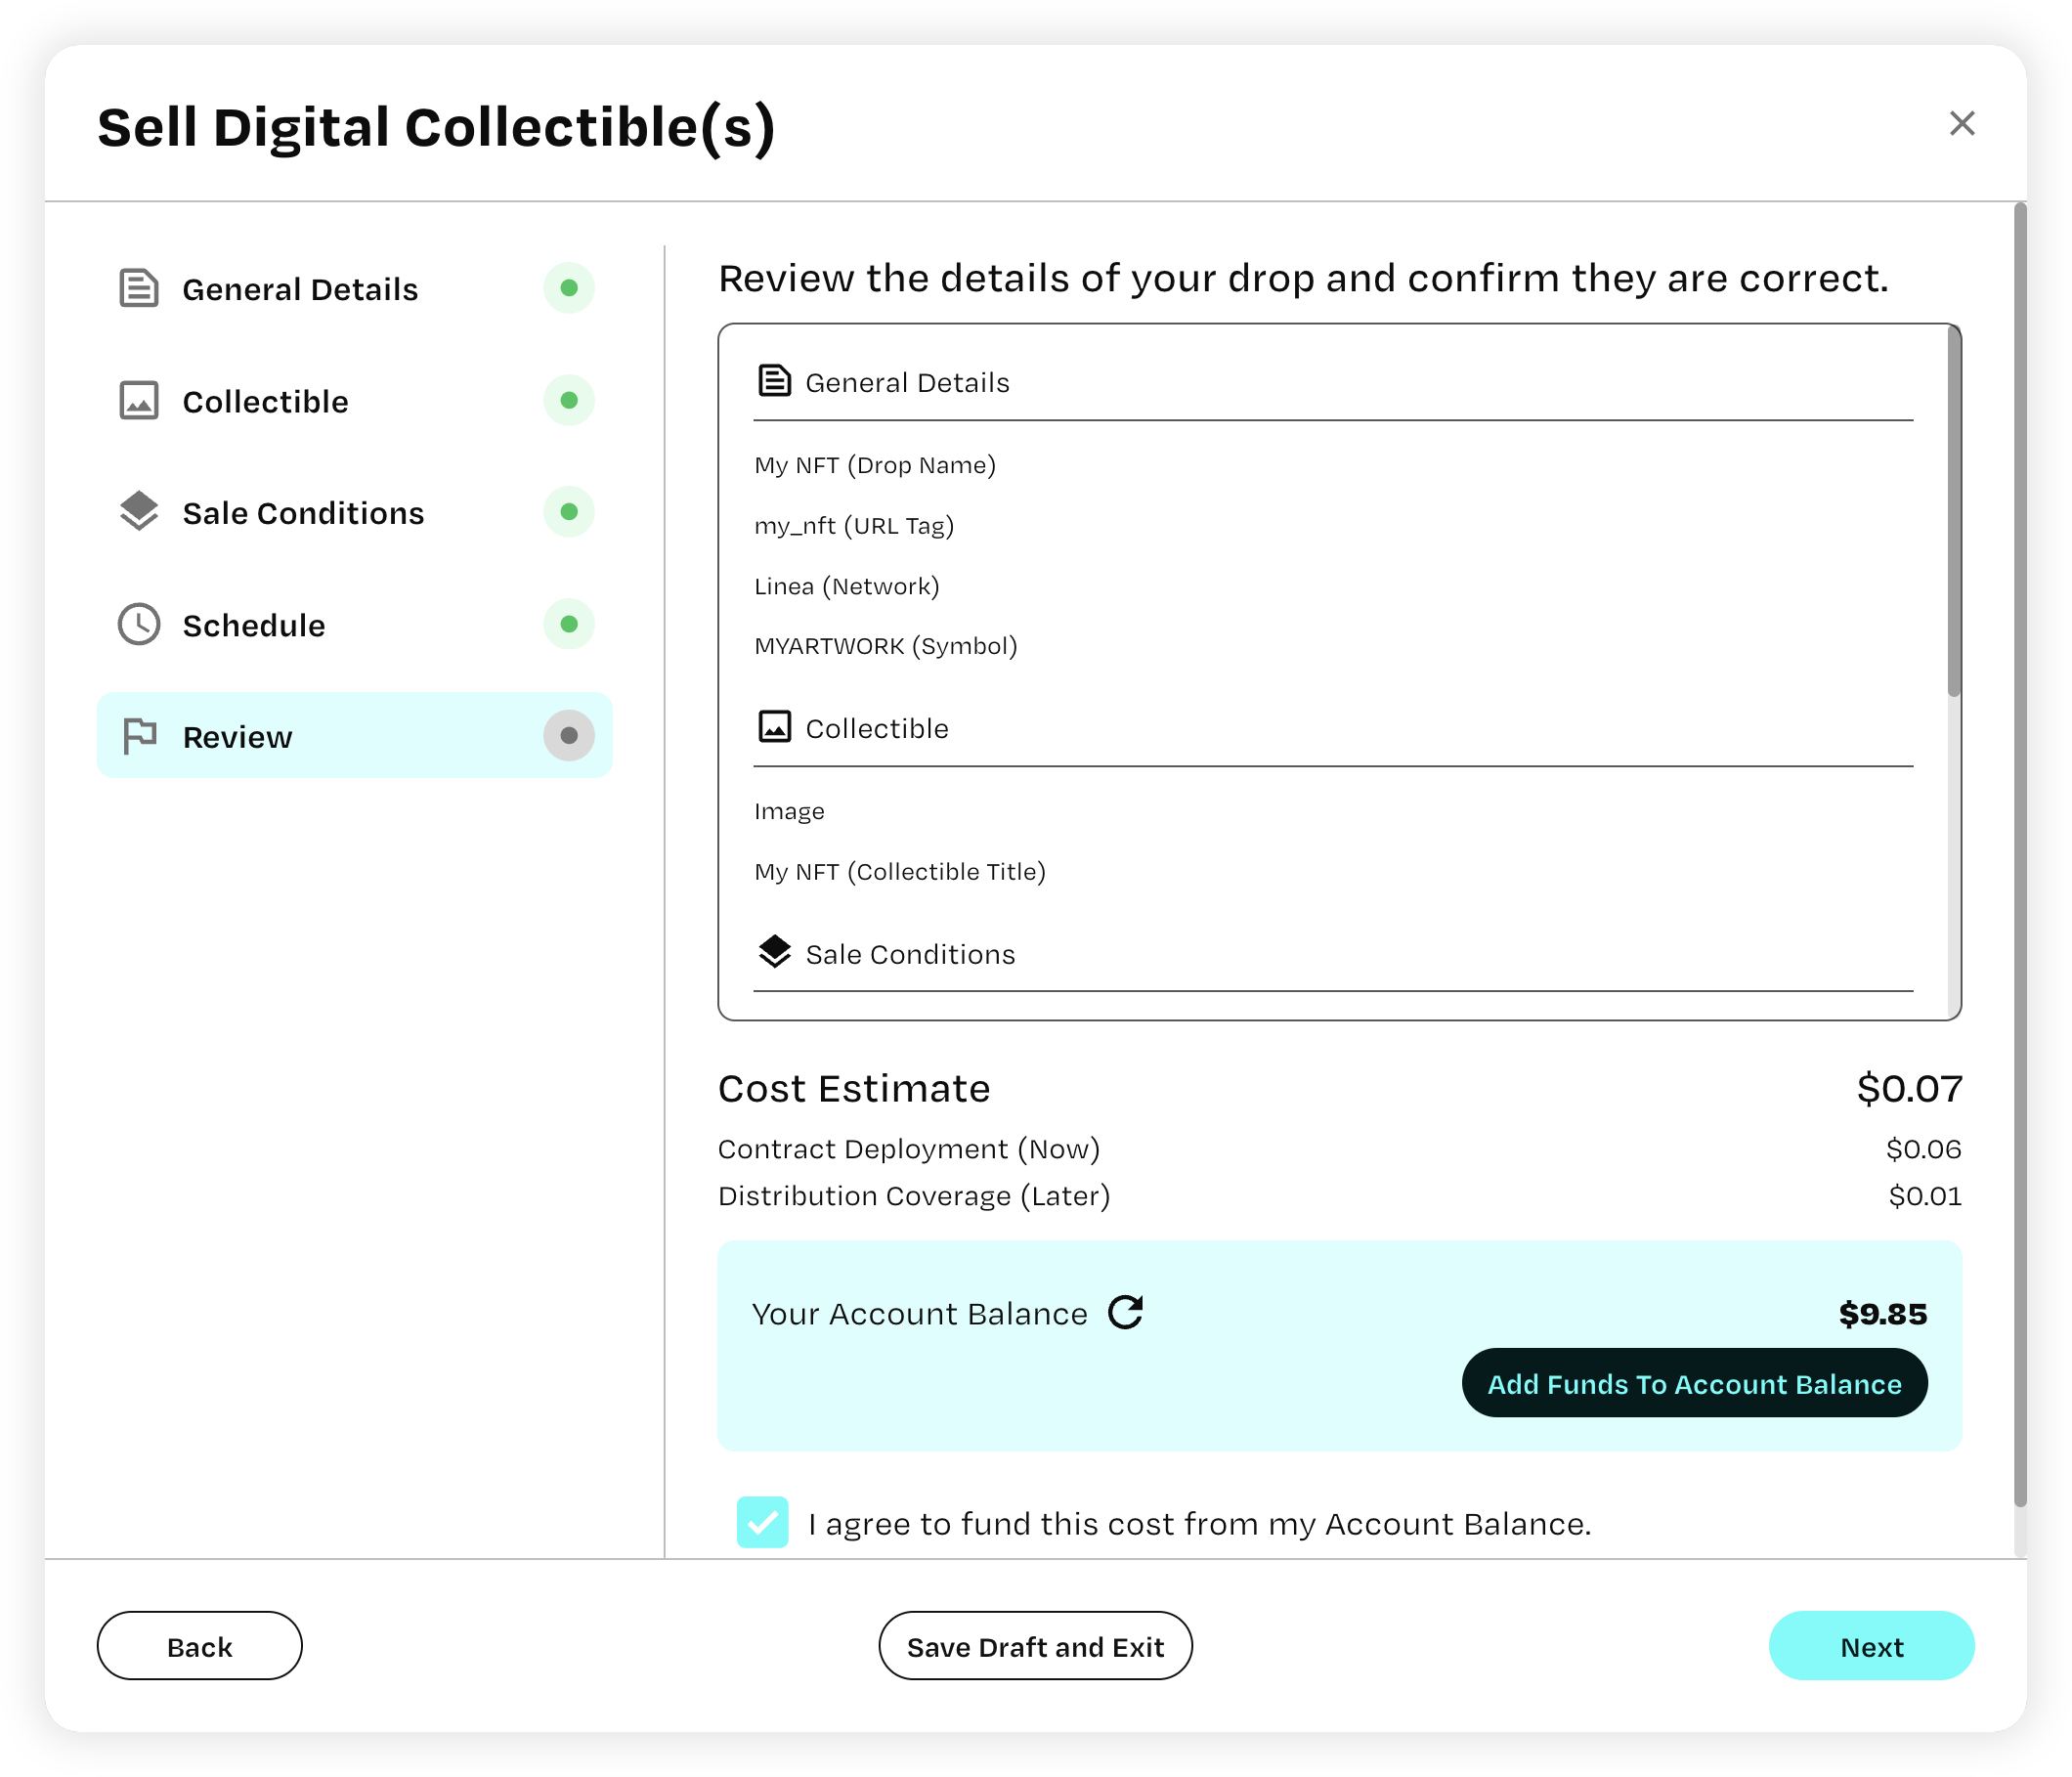
- Review details: Double check your drop details to ensure everything is in order. You can edit any information by clicking “Back”
- Cost estimate: Acknowledge and confirm the charge from your balance. If you’re short on funds, and need to top up your account, follow this guide.
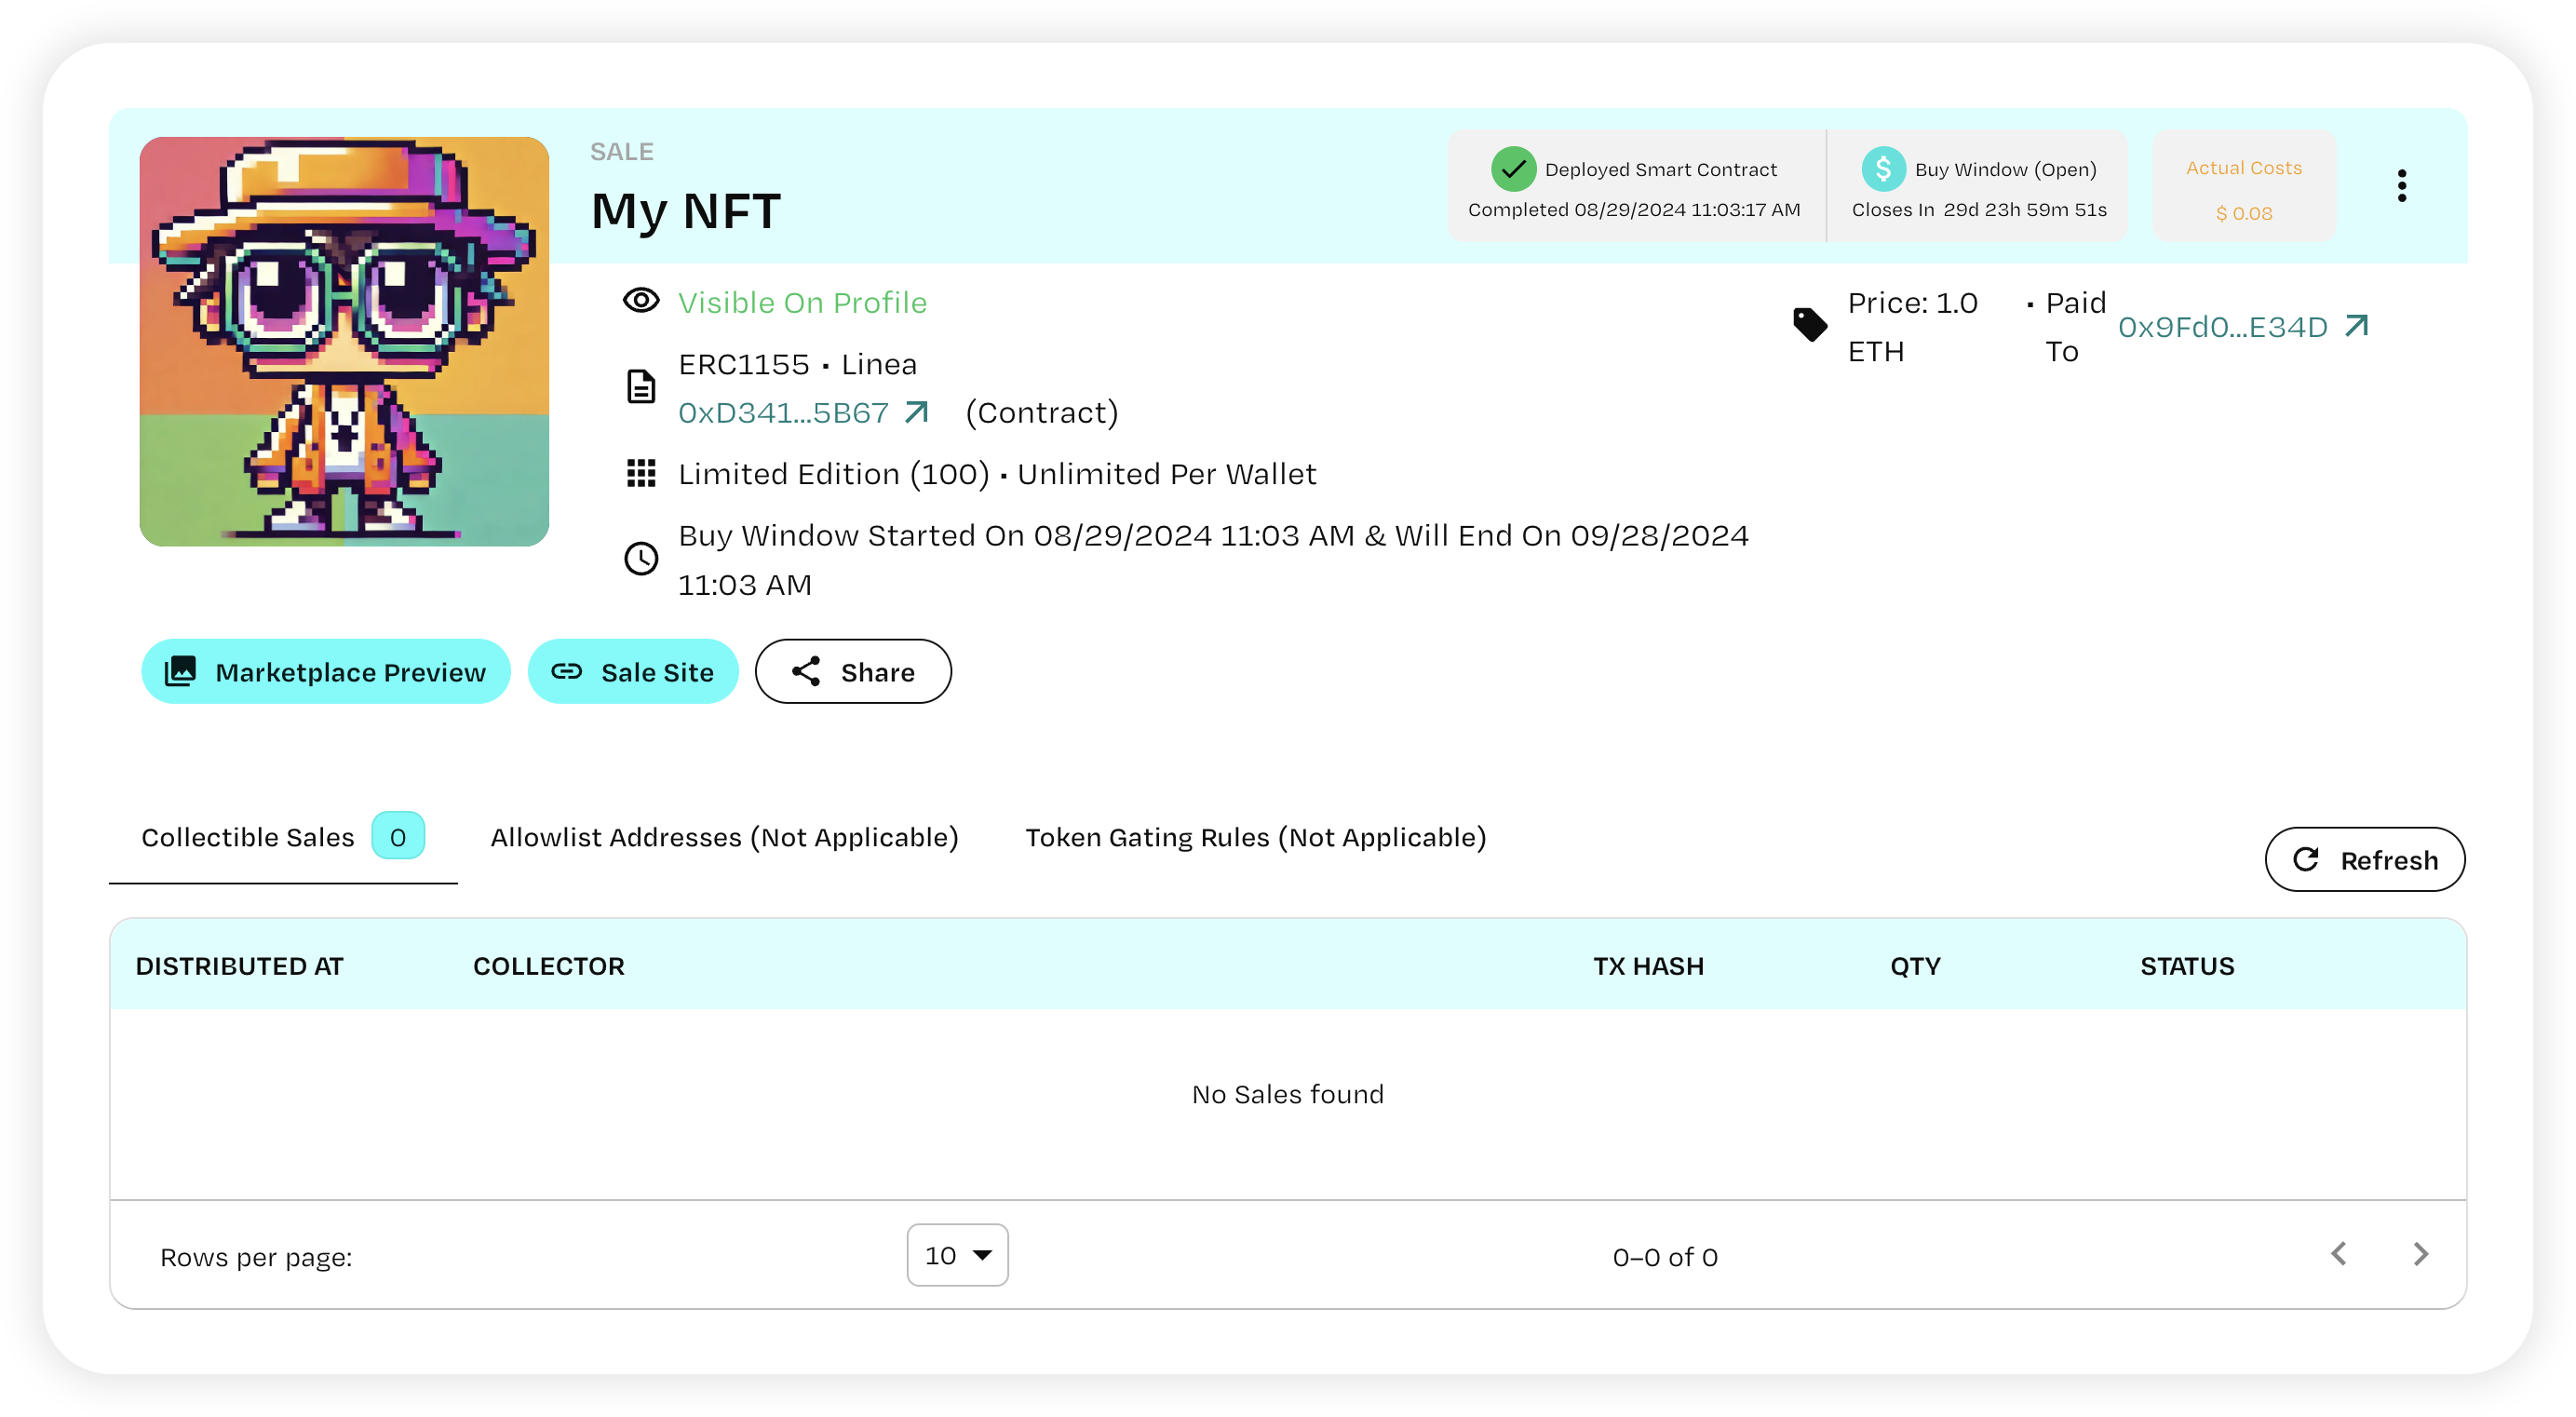
Click “Next” to publish your sale page and deploy your collectible.
You can view the site, marketplace preview, and share the link on the next screen that will look like this:
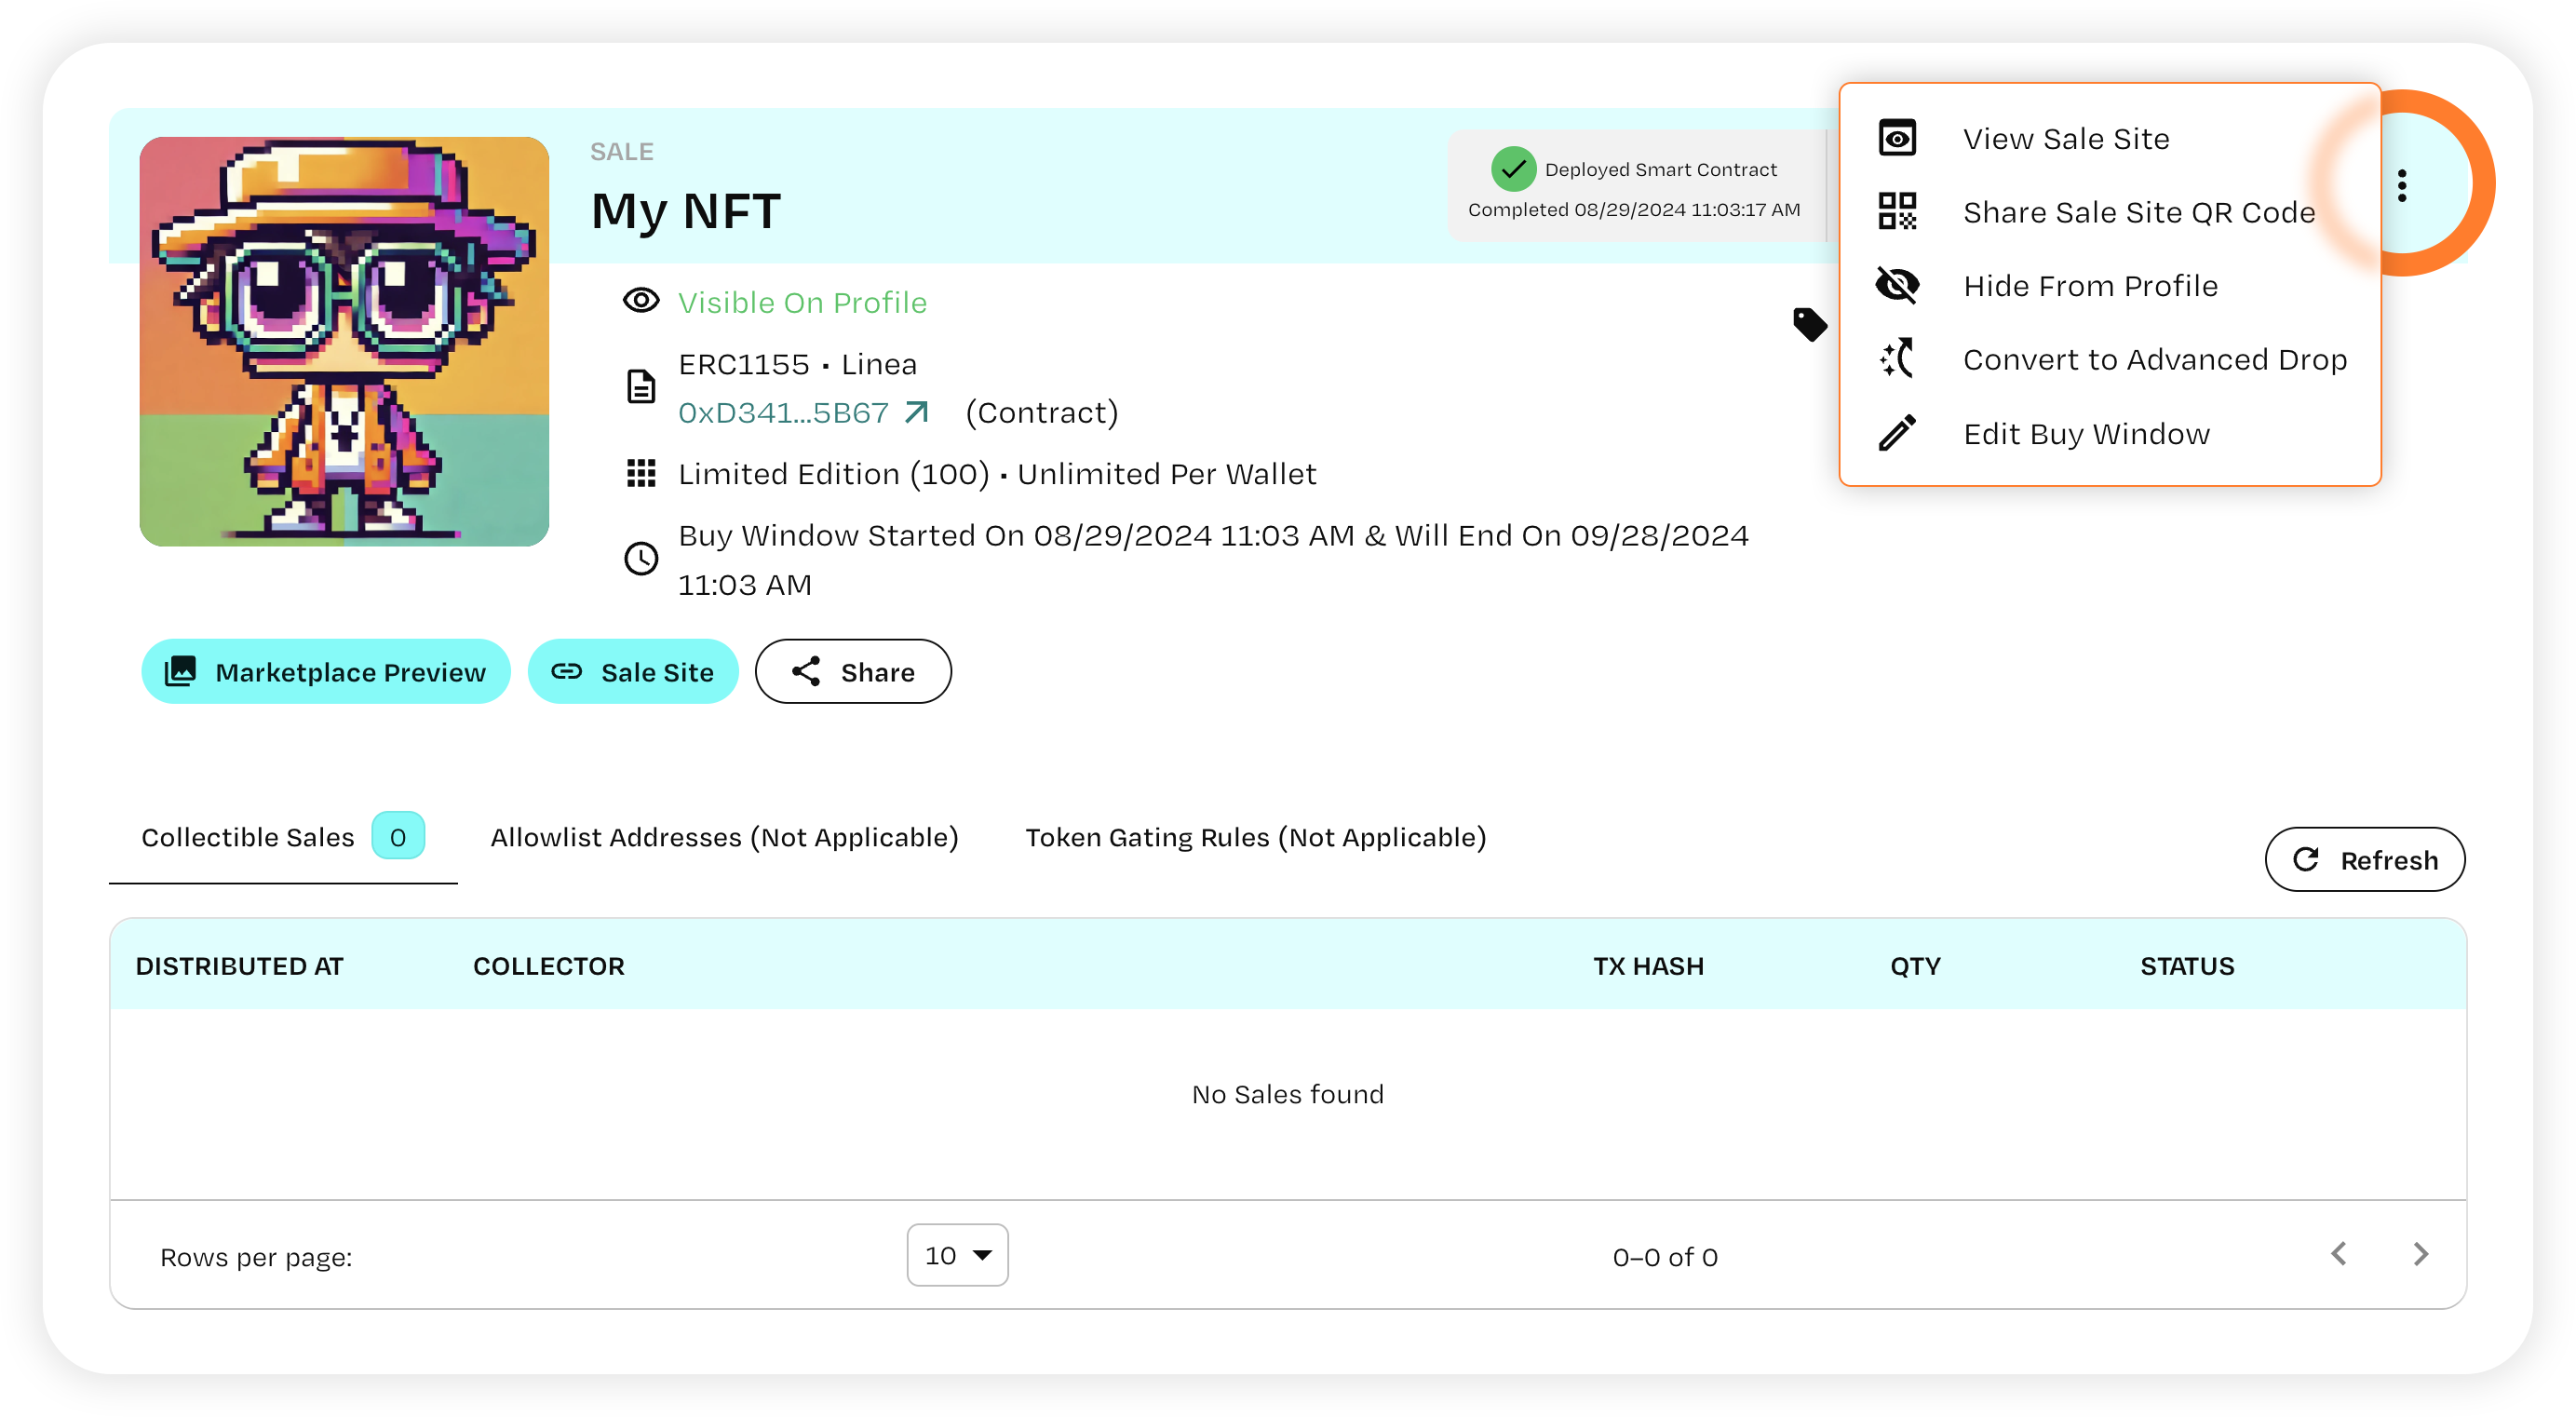
Click the three dots on the right side of the banner to access additional customization options:
Voila! Your collectible is now live. Enjoy, spread it to your network, and if you have any questions, contact our support team.